Main Menu Tutorial for Unity
User Interface (UI) combines graphics, text, and buttons and plays a crucial part in providing an enjoyable gaming experience.
Main Menu is one of the most prominent parts of the UI since it's usually the first thing that players see when loading the game.
In this tutorial, I will be showing how to create a Main Menu in Unity using UI Canvas.
Step 1: Design The Main Menu
- Create a new Canvas (GameObject -> UI -> Canvas)

- Create a new Image by right-clicking on Canvas -> UI -> Image (This will be Menu Background)

- Assign the Texture to a newly created Image. You can use the image below (Right-click -> Save as...), and make sure its Texture Type is set to 'Sprite (2D and UI)' in Import Settings:

- Create a new script, call it SC_BackgroundScaler then paste the code below inside it:
SC_BackgroundScaler.cs
using UnityEngine;
using UnityEngine.UI;

[ExecuteInEditMode]
public class SC_BackgroundScaler : MonoBehaviour
{
    Image backgroundImage;
    RectTransform rt;
    float ratio;

    // Start is called before the first frame update
    void Start()
    {
        backgroundImage = GetComponent<Image>();
        rt = backgroundImage.rectTransform;
        ratio = backgroundImage.sprite.bounds.size.x / backgroundImage.sprite.bounds.size.y;
    }

    // Update is called once per frame
    void Update()
    {
        if (!rt)
            return;

        //Scale image proportionally to fit the screen dimensions, while preserving aspect ratio
        if(Screen.height * ratio >= Screen.width)
        {
            rt.sizeDelta = new Vector2(Screen.height * ratio, Screen.height);
        }
        else
        {
            rt.sizeDelta = new Vector2(Screen.width, Screen.width / ratio);
        }
    }
}- Attach the SC_BackgroundScaler script to a newly created image. (Upon attaching, the script will automatically scale the background image to fit the screen):

Create Menu Buttons:
- Right-click on Canvas -> Create Empty then rename it to "MainMenu". This Object will contain the UI elements for the Main Menu.
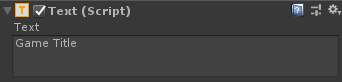
- Create new Text by Right-Clicking on the "MainMenu" object -> UI -> Text. This will be a title text.
- Change the Text to your game name (In my case it'll be "Game Title"):
- Change paragraph alignment to middle center and Color to white:
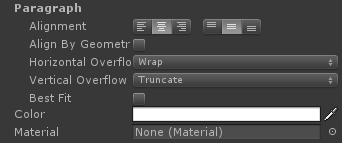
- Lastly, change the Font Size to something bigger (for example 30) and Font Style to Bold.
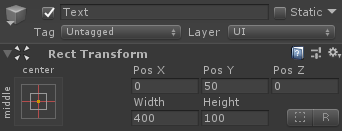
However, you will notice that the text disappeared, that's because the Rect Transform dimensions are too small. Change them to something bigger (ex. Width: 400 Height: 100), also move it up slightly by changing Pos Y to 50:
- Create 3 buttons (Right Click on the "MainMenu" object -> UI -> Button 3 times) and move each button down by 30 pixels.
- Change the Text of each button to "Play Now", "Credits" and "Quit" respectively:

- Duplicate the "MainMenu" object and rename it to "CreditsMenu", remove all the buttons inside it except the "Quit" button, and change its Text to "Back".
- Change the font size of the title Text in "CreditsMenu" to something smaller (ex. 14), change its Pos Y to 0, and type the credits text.

Step 2: Program The Menu Buttons
Now we need to make the Buttons functional by creating a script.
- Create a new script, call it SC_MainMenu then paste the code below inside it:
SC_MainMenu.cs
using System.Collections;
using System.Collections.Generic;
using UnityEngine;

public class SC_MainMenu : MonoBehaviour
{
    public GameObject MainMenu;
    public GameObject CreditsMenu;

    // Start is called before the first frame update
    void Start()
    {
        MainMenuButton();
    }

    public void PlayNowButton()
    {
        // Play Now Button has been pressed, here you can initialize your game (For example Load a Scene called GameLevel etc.)
        UnityEngine.SceneManagement.SceneManager.LoadScene("GameLevel");
    }

    public void CreditsButton()
    {
        // Show Credits Menu
        MainMenu.SetActive(false);
        CreditsMenu.SetActive(true);
    }

    public void MainMenuButton()
    {
        // Show Main Menu
        MainMenu.SetActive(true);
        CreditsMenu.SetActive(false);
    }

    public void QuitButton()
    {
        // Quit Game
        Application.Quit();
    }
}- Attach SC_MainMenu to the Canvas object
- Assign the "MainMenu" Object to the Main Menu variable
- Assign the "CreditsMenu" Object to the Credits Menu variable
The last step is to bind SC_MainMenu functions to each Button.
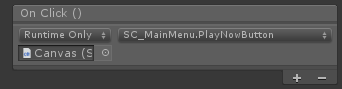
- Select the Button and in "On Click ()" click (+) to add a new element variable:
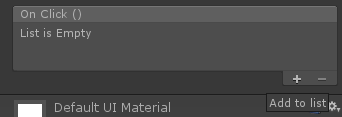
- Assign the Object with SC_MainMenu script (Canvas) to the Button "On Click ()" and select the function that corresponds to the button ("PlayNowButton()" for Play Now Button, "CreditsButton()" for the Credits Button, "QuitButton()" for Quit Button and "MainMenuButton()" to Back Button in Credits Menu).

The Main Menu is now ready.
NOTE: PlayNowButton() function in SC_MainMenu.cs will attempt to load a Scene called "GameLevel". So make sure you have a scene with the name "GameLevel", which is also added to Build settings (alternatively you can change the name in that line to correspond to the name of the Scene you want to load).
Interested in learning more about UI creation? Check our tutorial on How to Make Mobile Touch Controls in Unity.