Unity Cinemachine and Timeline Tutorial
Cinemachine is a package for Unity that gives developers professional camera control and enhances the ability to create cinematic cutscenes.
This tutorial will cover the following topics:
- Cinemachine Installation
- Third-Person Camera Setup
- Timeline Cutscene Creation
Cinemachine Installation
To install Cinemachine, follow the steps below:
- In Unity go to Window -> Package Manager
- Change Packages to "Unity Registry"
- Select "Cinemachine" from the list then click "Install"
![]()
The Cinemachine is now ready to use.
Third-Person Camera Setup
Below I will show how to set up a 3rd-person camera using Cinemachine's Virtual Camera.
A Virtual Camera is a lightweight version of a Unity camera, that does not render on its own, but is merely used as a reference point for the Main Camera.
As an example for this tutorial, I will be using a Third-person controller, except without setting up the Camera collision and without moving the Camera inside the player hierarchy:

As you can see the player is moving but the camera does not follow.
Setting up a third-person camera using Cinemachine is really easy:
- Go to GameObject -> Cinemachine -> Virtual Camera to create a new virtual camera

- Name the virtual camera "TPS Camera"
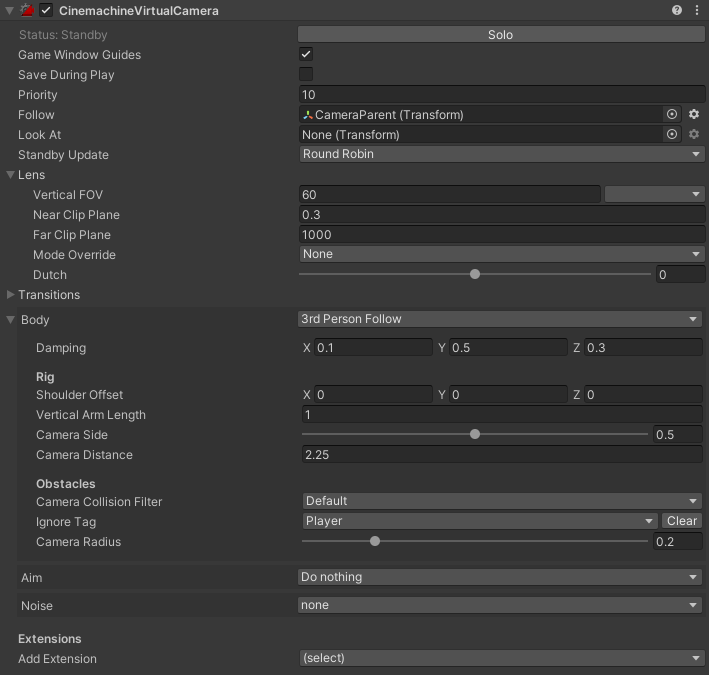
- Select TPS Camera and in CinemachineVirtualCamera assign Follow variable (in my case it'll be "CameraParent" object, which is located inside a player hierarchy and represents vertical look rotation)
- Set Body value to "3rd Person Follow"
- Set Ignore Tag to "Player" and also select the player root object and set its tag to "Player" (if there are any child colliders in the player hierarchy, make sure to change their tags to "Player" as well)
- Tweak other values in CinemachineVirtualCamera such as Camera Distance, Camera Side, Shoulder Offset, and Damping until you are happy with the result.
- Set Aim value of CameraParent to "Do nothing"
The Camera should now follow the player:

Timeline Cutscene Creation
Here I will be showing how to compose a cutscene using Unity's Timeline.
Timeline is a built-in editor that enables developers to compose cutscenes by animating the camera, and also by using existing animations (ex. character walk), plus events and signals by arranging them in a sequential manner.
Cinemachine package adds a few extra options to a Timeline editor, such as the ability to switch between Virtual Cameras.
To create a cutscene, follow the steps below:
- Create a new GameObject and call it "TimelineManager"
- Open Timeline window by going to Window -> Sequencing -> Timeline

- Select "TimelineManager" Object and in the Timeline window, you should see an option to create a Director component and Timeline asset, click it.

- After creating the Director component and Timeline asset, you should see the empty Timeline window (make sure the TimelineManager object is selected to be able to edit it).
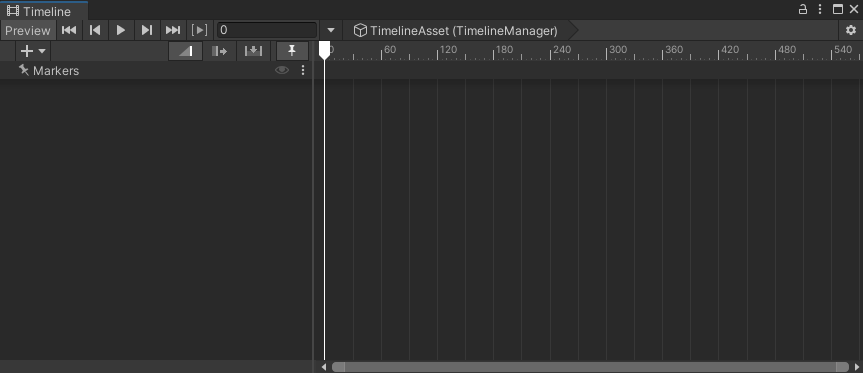
- We can now begin adding components to the timeline by right-clicking on the window.

As you can see, the Timeline window has various options:
- Track Group - this is a group that can contain timeline actions and is useful for organizing.
- Activation Track - this defines the object that should be active only during a set timeframe.
- Animation Track - this will play a specific animation during a set timeframe.
- Audio Track - this will play specific audio during a set timeframe.
- Control Track - a track whose clips control time-related elements on a GameObject.
- Signal Track - this allows performing a wide variety of actions on a specific game object at a specific time (ex. activate player movement script or call a specific function when the timeline reaches a certain frame, etc.)
- Playable Track - a track whose clips are custom playables.
- Cinemachine Track - this allows to blend between multiple cinemachine virtual cameras.
For the purpose of this tutorial, I will only be using Animation Track and Signal Track.
Set up
- Create another virtual camera and name it "CutsceneCamera" and set its "Priority" value to one level above "TPS Camera" (ex. 11)
- Right-click in project view -> Create -> Signal and name it "DisablePlayer"
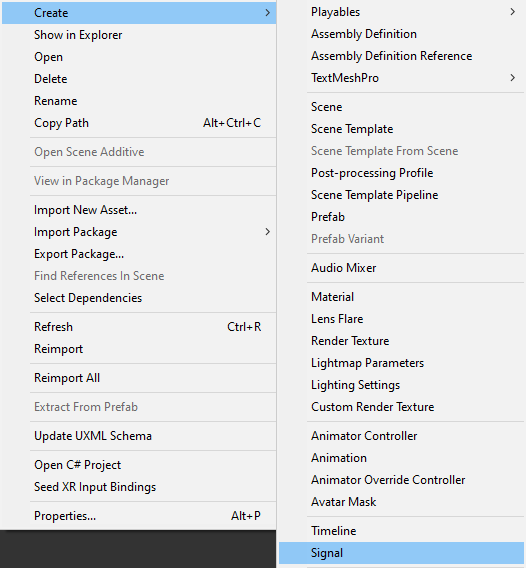
- Duplicate "DisablePlayer" signal and rename it to "EnablePlayer"
![]()
- Create a new GameObject in the scene and name it "SignalReceiver"
- Attach SignalReceiver component to a "SignalReceiver" Object
- Click "Add Reaction" 2 times
- Assign "DisablePlayer" to a first reaction and "EnablePlayer" to a second reaction
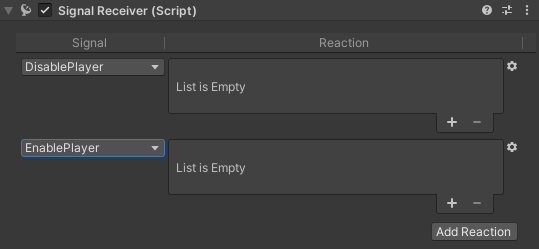
"DisablePlayer" will activate the cutscene camera, deactivate the player camera and player control script, and will be placed at the start of the timeline.
"EnablePlayer" will deactivate the cutscene camera, activate the player camera and player control script, and will be placed at the end of the timeline.
- Click (+) to add a reaction slot then assign the object whose script or component needed to be activated/deactivated.
Tip: To create an opposite signal, you can just set up the reactions for "DisablePlayer" then click on Gear icon -> Duplicate, change the signal to "EnablePlayer" and invert the checkboxes.


- Select "TimelineManager" object then in the Timeline window add a new signal track by right-clicking -> Signal Track then assign "SignalReceiver" object to it.
- Drag & drop "DisablePlayer" signal asset at the start of the timeline and "EnablePlayer" to the frame you want the cutscene to end:

This will make the player controller script and the camera deactivated in the beginning and then reactivated once the timeline reaches the end.
Lastly, we are going to create a simple camera animation.
- Right-click on Timeline -> Animation Track then assign "CutsceneCamera" (this will ask to add Animator component to the object if there is none)
- Click record button

- Move the "CutsceneCamera" slightly, so the keyframe is applied then move the Timeline frame handle to the end, and lastly, move the camera to a new position then click stop Recording.

Let's press play and see the result:

The cutscene is played at the beginning of the game.