Unity Mecanim How to Play Animation on Keypress
Mecanim is a state-driven tool for Unity that gives developers advanced animation control and a feature-rich editor.
Prominent features of Mecanim are animation blending and animation retargeting.
Animation blending is an automatic process of making smooth transitions between animations.
Animation retargeting is a process of repurposing existing animations to work between multiple character rigs, eliminating the need to create new animations for each new character.

In this tutorial, I will be showing how to Animate a Cube and play the Animation on Keypress with Mecanim.
Steps
To animate a Cube in Unity, follow the steps below:
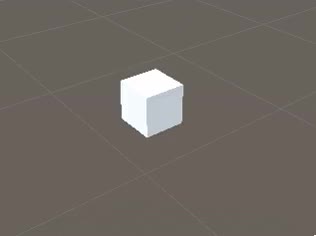
- Create new Cube (GameObject -> 3D Object -> Cube)

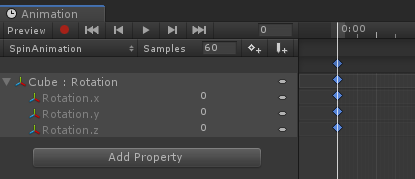
- Select Cube then open the Animation window (Window -> Animation -> Animation)
- In the Animation window click "Create", which will create a new animation, a new Animator Controller, and will attach an Animator component to the Cube.
- Name the new animation "SpinAnimation"

- In the Animation Window Click AddProperty -> Transform -> Rotation
- This animation will have 2 frames, start and finish.
- For the first frame, we set rotation to (0, 0, 0)

- For the last frame, we set rotation to (0, 360, 0)

The animation is ready.
Tip: To create more animations, simply click on the animation name in the Animation window then click "Create new Clip...".
To set up Mecanim Animator Controller, follow the steps below:
- Double-click on the Animator Controller asset that was created with the animation
![]()
- New Window titled "Animator" will appear, which should look something like this:

- You will notice there is an arrow pointing from the "Entry" to the "SpinAnimation", which means that the animation will play as soon as the Scene starts, but that's not what we want, we want to only play the animation on keypress.
Since Mecanim requires to have an entry animation, what we can do is create a new Empty state and make it an Entry:
- Right Click on Animator window -> Create State -> Empty:


- Select Entry state -> Right-click on it -> Set StateMachine Default State, then point to "New State":


The last thing left to do is to make a transition to SpinAnimation, but we only want to do the transition once the specific condition is met, that's when Parameters Tab comes in place:
- Click the Parameters tab in the Animator window then click the (+) symbol:

You will notice there are multiple types available, but for now, we will select Trigger, it's similar to bool but unlike bool, it's automatically set itself to false once the animation is completed, useful for one-shot animations:
- Name the parameter "spinTrigger"

- Lastly select "Any State" -> Right Click on it -> Make Transition, then point to SpinAnimation:


- Click on the transition Arrow and in Inspector View under Conditions click (+) and make sure spinTrigger parameter is selected

- By default animations created with Unity have loop enabled, but since we only want to play Animation once, what we need to do is select the Animation Clip in the Project view and then uncheck the Loop Time checkbox:

To be able to control Mecanim parameters from a script, we will need to use special functions, check the code below:
- Create a new script, call it "AnimationTest", remove everything from it then paste the code below inside it:
AnimationTest.cs
using UnityEngine;

public class AnimationTest : MonoBehaviour
{

    Animator animator;

    // Start is called before the first frame update
    void Start()
    {
        //Get Animator component
        animator = GetComponent<Animator>();
    }

    // Update is called once per frame
    void Update()
    {
        //Play spin animation on key press
        if (Input.GetKeyDown(KeyCode.Q))
        {
            animator.SetTrigger("spinTrigger");
        }
    }
}- Attach AnimationTest.cs script to Cube with Animator component:

Now let's test it:

Everything works as expected, pressing Q plays the animation.