Photon Network (Classic) Beginner's Guide
Photon Network is a service for Unity that allows developers to create real-time multiplayer games.
It provides a powerful and easy-to-use API which makes it perfect even for novice developers.
In this post, we will be running through downloading the necessary files, setting up Photon AppID, and programming a simple multiplayer example.
Part 1: Setting Up Photon Network
The first step is to download the Photon Network package from the Asset Store. It contains all the necessary scripts and files for multiplayer integration.
- Open your Unity project then go to the Asset Store: (Window -> General -> AssetStore) or press Ctrl+9
- Search for "Photon Unity Networking Classic - Free" then click the first result or click here
- Import the Photon package after Download is finished


- After the package is imported you need to create a Photon App ID, this is done on their website: https://www.photonengine.com/
- Create a new account (or Login into your existing account)
- Go to the Applications page by clicking the profile icon and then "Your Applications" or follow this link: https://dashboard.photonengine.com/en-US/PublicCloud
- On the Applications page click "Create new app"

- On the creation page, for Photon Type select "Photon Realtime" and for the Name, type any name then click "Create"

As you can see, the Application defaults to the Free plan. You can read more about Pricing Plans here
- Once the Application is created, copy the App ID located under the App name

- Go back to your Unity project then go to Window -> Photon Unity Networking -> PUN Wizard
- In PUN Wizard click "Setup Project", paste your App ID then click "Setup Project"
- The Photon Network is now ready
Part 2: Creating a multiplayer game
Now let's move to the part where we actually create a multiplayer game.
The way multiplayer is handled in Photon is:
- First, we connect to the Photon Region (ex. USA East, Europe, Asia, etc.) which is also known as Lobby.
- Once in the Lobby, we request all the Rooms that are created in the region, then we can either join one of the Rooms or create our own Room.
- After we joined the room we request a list of the players connected to the room and instantiate their Player instances, which are then synced with their local instances through PhotonView.
- When someone leaves the Room, their instance is destroyed and they are removed from the Player List.
1. Setting up a Lobby
Let's start by creating a MainMenu which will contain a Lobby logic (Browsing existing rooms, creating new rooms, etc.).
- Create a new Scene and call it "MainMenu"
- Create a new C# script and call it GameLobby
- In the MainMenu scene create a new GameObject. Call it "_GameLobby" and attach the GameLobby script to it
Now open the GameLobby script.
First, let's create all the necessary variables:
    //Our player name
    string playerName = "Player 1";
    //This client's version number. Users are separated from each other by gameversion (which allows you to make breaking changes).
    string gameVersion = "0.9";
    //The list of created rooms
    RoomInfo[] createdRooms = new RoomInfo[0];
    //Use this name when creating a Room
    string roomName = "Room 1";
    Vector2 roomListScroll = Vector2.zero;
    bool joiningRoom = false;
The next thing we need to do is to enable Auto-Join Lobby and Lobby Stats, this will allow us to receive the room list. This is done in the void Start().
Also, we enable automaticallySyncScene so the Scene is automatically synced once we join the Room.
And lastly, we call PhotonNetwork.ConnectUsingSettings to connect.
    // Use this for initialization
    void Start()
    {
        //Automatically join Lobby after we connect to Photon Region
        PhotonNetwork.PhotonServerSettings.JoinLobby = true;
        //Enable Lobby Stats to receive the list of Created rooms
        PhotonNetwork.PhotonServerSettings.EnableLobbyStatistics = true;
        //This makes sure we can use PhotonNetwork.LoadLevel() on the master client and all clients in the same room sync their level automatically
        PhotonNetwork.automaticallySyncScene = true;

        if (!PhotonNetwork.connected)
        {
            // Connect to the photon master-server. We use the settings saved in PhotonServerSettings (a .asset file in this project)
            PhotonNetwork.ConnectUsingSettings(gameVersion);
        }
    }
To know whether a connection to Photon Cloud was successful we have to implement these 2 callbacks: OnReceivedRoomListUpdate() and OnFailedToConnectToPhoton(object parameters).
    void OnFailedToConnectToPhoton(object parameters)
    {
        Debug.Log("OnFailedToConnectToPhoton. StatusCode: " + parameters + " ServerAddress: " + PhotonNetwork.ServerAddress);
        //Try to connect again
        PhotonNetwork.ConnectUsingSettings(gameVersion);
    }

    void OnReceivedRoomListUpdate()
    {
        Debug.Log("We have received the Room list");
        //After this callback, PhotonNetwork.GetRoomList() becomes available
        createdRooms = PhotonNetwork.GetRoomList();
    }
Next is the UI part, where the Room browsing and Room creation are done:

And lastly we implement another 4 callbacks: OnPhotonCreateRoomFailed(), OnPhotonJoinRoomFailed(object[] cause), OnCreatedRoom() and OnJoinedRoom().
These callbacks are used to determine whether we Joined/Created the room or if there were any issues during the connection.
    void OnPhotonCreateRoomFailed()
    {
        Debug.Log("OnPhotonCreateRoomFailed got called. This can happen if the room exists (even if not visible). Try another room name.");
        joiningRoom = false;
    }

    void OnPhotonJoinRoomFailed(object[] cause)
    {
        Debug.Log("OnPhotonJoinRoomFailed got called. This can happen if the room is not existing or full or closed.");
        joiningRoom = false;
    }

    void OnCreatedRoom()
    {
        Debug.Log("OnCreatedRoom");
        //Set our player name
        PhotonNetwork.playerName = playerName;
        //Load the Scene called GameLevel (Make sure it's added to build settings)
        PhotonNetwork.LoadLevel("GameLevel");
    }

    void OnJoinedRoom()
    {
        Debug.Log("OnJoinedRoom");
    }
And here is the final GameLobby.cs script:
using System.Collections;
using System.Collections.Generic;
using UnityEngine;

public class GameLobby : MonoBehaviour
{
    //Our player name
    string playerName = "Player 1";
    //This client's version number. Users are separated from each other by gameversion (which allows you to make breaking changes).
    string gameVersion = "0.9";
    //The list of created rooms
    RoomInfo[] createdRooms = new RoomInfo[0];
    //Use this name when creating a Room
    string roomName = "Room 1";
    Vector2 roomListScroll = Vector2.zero;
    bool joiningRoom = false;

    // Use this for initialization
    void Start()
    {
        //Automatically join Lobby after we connect to Photon Region
        PhotonNetwork.PhotonServerSettings.JoinLobby = true;
        //Enable Lobby Stats to receive the list of Created rooms
        PhotonNetwork.PhotonServerSettings.EnableLobbyStatistics = true;
        //This makes sure we can use PhotonNetwork.LoadLevel() on the master client and all clients in the same room sync their level automatically
        PhotonNetwork.automaticallySyncScene = true;

        if (!PhotonNetwork.connected)
        {
            // Connect to the photon master-server. We use the settings saved in PhotonServerSettings (a .asset file in this project)
            PhotonNetwork.ConnectUsingSettings(gameVersion);
        }
    }

    void OnFailedToConnectToPhoton(object parameters)
    {
        Debug.Log("OnFailedToConnectToPhoton. StatusCode: " + parameters + " ServerAddress: " + PhotonNetwork.ServerAddress);
        //Try to connect again
        PhotonNetwork.ConnectUsingSettings(gameVersion);
    }

    void OnReceivedRoomListUpdate()
    {
        Debug.Log("We have received the Room list");
        //After this callback, PhotonNetwork.GetRoomList() becomes available
        createdRooms = PhotonNetwork.GetRoomList();
    }

    void OnGUI()
    {
        GUI.Window(0, new Rect(Screen.width/2 - 450, Screen.height/2 - 200, 900, 400), LobbyWindow, "Lobby");
    }

    void LobbyWindow(int index)
    {
        //Connection Status and Room creation Button
        GUILayout.BeginHorizontal();

            GUILayout.Label("Status: " + PhotonNetwork.connectionStateDetailed);

            if(joiningRoom || !PhotonNetwork.connected)
            {
                GUI.enabled = false;
            }

            GUILayout.FlexibleSpace();

            //Room name text field
            roomName = GUILayout.TextField(roomName, GUILayout.Width(250));

            if (GUILayout.Button("Create Room", GUILayout.Width(125)))
            {
                if (roomName != "")
                {
                    joiningRoom = true;

                    RoomOptions roomOptions = new RoomOptions();
                    roomOptions.IsOpen = true;
                    roomOptions.IsVisible = true;
                    roomOptions.MaxPlayers = (byte)10; //Set any number

                    PhotonNetwork.JoinOrCreateRoom(roomName, roomOptions, TypedLobby.Default);
                }
            }

        GUILayout.EndHorizontal();

        //Scroll through available rooms
        roomListScroll = GUILayout.BeginScrollView(roomListScroll, true, true);

            if(createdRooms.Length == 0)
            {
                GUILayout.Label("No Rooms were created yet...");
            }
            else
            {
                for(int i = 0; i < createdRooms.Length; i++)
                {
                    GUILayout.BeginHorizontal("box");
                    GUILayout.Label(createdRooms[i].Name, GUILayout.Width(400));
                    GUILayout.Label(createdRooms[i].PlayerCount + "/" + createdRooms[i].MaxPlayers);

                    GUILayout.FlexibleSpace();

                    if (GUILayout.Button("Join Room"))
                    {
                        joiningRoom = true;

                        //Set our Player name
                        PhotonNetwork.playerName = playerName;

                        //Join the Room
                        PhotonNetwork.JoinRoom(createdRooms[i].Name);
                    }
                    GUILayout.EndHorizontal();
                }
            }

        GUILayout.EndScrollView();

        //Set player name and Refresh Room button
        GUILayout.BeginHorizontal();

            GUILayout.Label("Player Name: ", GUILayout.Width(85));
            //Player name text field
            playerName = GUILayout.TextField(playerName, GUILayout.Width(250));

            GUILayout.FlexibleSpace();

            GUI.enabled = PhotonNetwork.connectionState != ConnectionState.Connecting && !joiningRoom;
            if (GUILayout.Button("Refresh", GUILayout.Width(100)))
            {
                if (PhotonNetwork.connected)
                {
                    //We are already connected, simply update the Room list
                    createdRooms = PhotonNetwork.GetRoomList();
                }
                else
                {
                    //We are not connected, estabilish a new connection
                    PhotonNetwork.ConnectUsingSettings(gameVersion);
                }
            }

        GUILayout.EndHorizontal();

        if (joiningRoom)
        {
            GUI.enabled = true;
            GUI.Label(new Rect(900/2 - 50, 400/2 - 10, 100, 20), "Connecting...");
        }
    }

    void OnPhotonCreateRoomFailed()
    {
        Debug.Log("OnPhotonCreateRoomFailed got called. This can happen if the room exists (even if not visible). Try another room name.");
        joiningRoom = false;
    }

    void OnPhotonJoinRoomFailed(object[] cause)
    {
        Debug.Log("OnPhotonJoinRoomFailed got called. This can happen if the room is not existing or full or closed.");
        joiningRoom = false;
    }

    void OnCreatedRoom()
    {
        Debug.Log("OnCreatedRoom");
        //Set our player name
        PhotonNetwork.playerName = playerName;
        //Load the Scene called GameLevel (Make sure it's added to build settings)
        PhotonNetwork.LoadLevel("GameLevel");
    }

    void OnJoinedRoom()
    {
        Debug.Log("OnJoinedRoom");
    }
}
2. Creating a Player prefab
In Multiplayer games, the Player instance has 2 sides: Local and Remote.
A local instance is controlled locally (by us).
Remote instance, on the other hand, is a local representation of what the other player is doing. It should be unaffected by our input.
To determine whether the instance is Local or Remote we use a PhotonView component.
PhotonView acts as a messenger that receives and sends the values that need to be synced, for example, position and rotation.
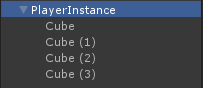
So let's begin by creating the player instance (If you already have your player instance ready, you can skip this step).
In my case, the Player instance will be a simple Cube that is moved with W, and S keys and rotated with A and D keys.

And here is a simple controller script:
PlayerController.cs
using UnityEngine;

public class PlayerController : MonoBehaviour
{
    // Update is called once per frame
    void Update()
    {
        //Move Front/Back
        if (Input.GetKey(KeyCode.W))
        {
            transform.Translate(transform.forward * Time.deltaTime * 2.45f, Space.World);
        }
        else if (Input.GetKey(KeyCode.S))
        {
            transform.Translate(-transform.forward * Time.deltaTime * 2.45f, Space.World);
        }

        //Rotate Left/Right
        if (Input.GetKey(KeyCode.A))
        {
            transform.Rotate(new Vector3(0, -14, 0) * Time.deltaTime * 4.5f, Space.Self);
        }
        else if (Input.GetKey(KeyCode.D))
        {
            transform.Rotate(new Vector3(0, 14, 0) * Time.deltaTime * 4.5f, Space.Self);
        }
    }
}
The next step is to add a PhotonView component.
- Add a PhotonView component to Player Instance
- Create a new C# script, call it PlayerNetworkSync, and open it (this script will be used to communicate through PhotonView)
The first thing we need to do is to replace MonoBehaviour with Photon.MonoBehaviour. This step is necessary to be able to use the cached photonView variable instead of using GetComponent<PhotonView>().
public class PlayerNetworkSync : Photon.MonoBehaviourAfter that, we can move to create all the necessary variables:
    //List of the scripts that should only be active for the local player (ex. PlayerController, MouseLook etc.)
    public MonoBehaviour[] localScripts;
    //List of the GameObjects that should only be active for the local player (ex. Camera, AudioListener etc.)
    public GameObject[] localObjects;
    //Values that will be synced over network
    Vector3 latestPos;
    Quaternion latestRot;
Then in the void Start() we check if the player is Local or Remote by using photonView.isMine:
    // Use this for initialization
    void Start()
    {
        if (photonView.isMine)
        {
            //Player is local
        }
        else
        {
            //Player is Remote
            for(int i = 0; i < localScripts.Length; i++)
            {
                localScripts[i].enabled = false;
            }
            for (int i = 0; i < localObjects.Length; i++)
            {
                localObjects[i].SetActive(false);
            }
        }
    }
The actual synchronization is done through the PhotonView's callback: OnPhotonSerializeView(PhotonStream stream, PhotonMessageInfo info):
    void OnPhotonSerializeView(PhotonStream stream, PhotonMessageInfo info)
    {
        if (stream.isWriting)
        {
            //We own this player: send the others our data
            stream.SendNext(transform.position);
            stream.SendNext(transform.rotation);
        }
        else
        {
            //Network player, receive data
            latestPos = (Vector3)stream.ReceiveNext();
            latestRot = (Quaternion)stream.ReceiveNext();
        }
    }
In this case, we only send the player Position and Rotation, but you can use the example above to send any value that is needed to be synced over the network, at a high frequency.
Received values are then applied in the void Update():
    // Update is called once per frame
    void Update()
    {
        if (!photonView.isMine)
        {
            //Update remote player (smooth this, this looks good, at the cost of some accuracy)
            transform.position = Vector3.Lerp(transform.position, latestPos, Time.deltaTime * 5);
            transform.rotation = Quaternion.Lerp(transform.rotation, latestRot, Time.deltaTime * 5);
        }
    }
Here is the final PlayerNetworkSync.cs script:
using System.Collections;
using System.Collections.Generic;
using UnityEngine;

public class PlayerNetworkSync : Photon.MonoBehaviour
{
    //List of the scripts that should only be active for the local player (ex. PlayerController, MouseLook etc.)
    public MonoBehaviour[] localScripts;
    //List of the GameObjects that should only be active for the local player (ex. Camera, AudioListener etc.)
    public GameObject[] localObject;
    //Values that will be synced over network
    Vector3 latestPos;
    Quaternion latestRot;

    // Use this for initialization
    void Start()
    {
        if (photonView.isMine)
        {
            //Player is local
        }
        else
        {
            //Player is Remote
            for(int i = 0; i < localScripts.Length; i++)
            {
                localScripts[i].enabled = false;
            }
            for (int i = 0; i < localObject.Length; i++)
            {
                localObject[i].SetActive(false);
            }
        }
    }

    void OnPhotonSerializeView(PhotonStream stream, PhotonMessageInfo info)
    {
        if (stream.isWriting)
        {
            //We own this player: send the others our data
            stream.SendNext(transform.position);
            stream.SendNext(transform.rotation);
        }
        else
        {
            //Network player, receive data
            latestPos = (Vector3)stream.ReceiveNext();
            latestRot = (Quaternion)stream.ReceiveNext();
        }
    }

    // Update is called once per frame
    void Update()
    {
        if (!photonView.isMine)
        {
            //Update remote player (smooth this, this looks good, at the cost of some accuracy)
            transform.position = Vector3.Lerp(transform.position, latestPos, Time.deltaTime * 5);
            transform.rotation = Quaternion.Lerp(transform.rotation, latestRot, Time.deltaTime * 5);
        }
    }
}- Add the PlayerNetworkSync.cs script to the PlayerInstance and assign it to the PhotonView Observed Components.
- Assign the PlayerCntroller.cs to the "Local Scripts" and assign the GameObjects (that you want to be deactivated for Remote players) to the "Local Objects"

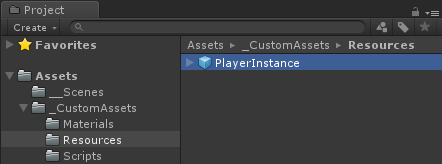
- Save the PlayerInstance to Prefab and move it to the folder called Resources (If there is no such folder, create one). This step is necessary to be able to spawn multiplayer Objects over the Network.
3. Creating a Game Level
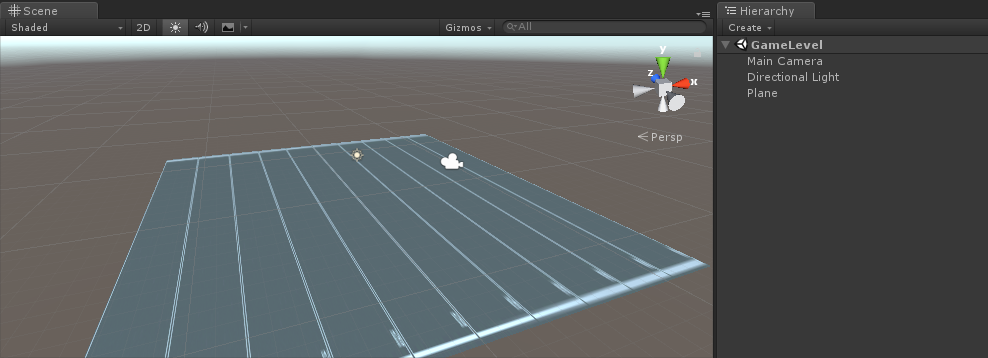
GameLevel is a Scene that is loaded after joining the Room and it's where all the action happens.
- Create a new Scene and call it "GameLevel" (Or if you want to keep a different name, make sure to change the name in this line PhotonNetwork.LoadLevel("GameLevel"); at the GameLobby.cs).
In my case, I will use a simple Scene with a Plane:
- Now create a new script and call it RoomController. This script will handle the logic inside the Room (Like spawning the players, showing the player list, etc.).
Let's start by defining the necessary variables:
    //Player instance prefab, must be located in the Resources folder
    public GameObject playerPrefab;
    //Player spawn point
    public Transform spawnPoint;
To instantiate the Player prefab we use PhotonNetwork.Instantiate:
    // Use this for initialization
    void Start()
    {
        //In case we started this demo with the wrong scene being active, simply load the menu scene
        if (!PhotonNetwork.connected)
        {
            UnityEngine.SceneManagement.SceneManager.LoadScene("MainMenu");
            return;
        }

        //We're in a room. spawn a character for the local player. it gets synced by using PhotonNetwork.Instantiate
        PhotonNetwork.Instantiate(playerPrefab.name, spawnPoint.position, Quaternion.identity, 0);
    }
And a simple UI with a "Leave Room" button and some additional elements such as Room name and the list of connected Players:
    void OnGUI()
    {
        if (PhotonNetwork.room == null)
            return;

        //Leave this Room
        if (GUI.Button(new Rect(5, 5, 125, 25), "Leave Room"))
        {
            PhotonNetwork.LeaveRoom();
        }

        //Show the Room name
        GUI.Label(new Rect(135, 5, 200, 25), PhotonNetwork.room.Name);

        //Show the list of the players connected to this Room
        for (int i = 0; i < PhotonNetwork.playerList.Length; i++)
        {
            //Show if this player is a Master Client. There can only be one Master Client per Room so use this to define the authoritative logic etc.)
            string isMasterClient = (PhotonNetwork.playerList[i].IsMasterClient ? ": MasterClient" : "");
            GUI.Label(new Rect(5, 35 + 30 * i, 200, 25), PhotonNetwork.playerList[i].NickName + isMasterClient);
        }
    }
And finally, we implement another PhotonNetwork callback called OnLeftRoom() which is called when we leave the Room:
    void OnLeftRoom()
    {
        //We have left the Room, return to the MainMenu
        UnityEngine.SceneManagement.SceneManager.LoadScene("MainMenu");
    }
And here is the final RoomController.cs script:
using UnityEngine;

public class RoomController : MonoBehaviour
{
    //Player instance prefab, must be located in the Resources folder
    public GameObject playerPrefab;
    //Player spawn point
    public Transform spawnPoint;

    // Use this for initialization
    void Start()
    {
        //In case we started this demo with the wrong scene being active, simply load the menu scene
        if (!PhotonNetwork.connected)
        {
            UnityEngine.SceneManagement.SceneManager.LoadScene("MainMenu");
            return;
        }

        //We're in a room. spawn a character for the local player. it gets synced by using PhotonNetwork.Instantiate
        PhotonNetwork.Instantiate(playerPrefab.name, spawnPoint.position, Quaternion.identity, 0);
    }

    void OnGUI()
    {
        if (PhotonNetwork.room == null)
            return;

        //Leave this Room
        if (GUI.Button(new Rect(5, 5, 125, 25), "Leave Room"))
        {
            PhotonNetwork.LeaveRoom();
        }

        //Show the Room name
        GUI.Label(new Rect(135, 5, 200, 25), PhotonNetwork.room.Name);

        //Show the list of the players connected to this Room
        for (int i = 0; i < PhotonNetwork.playerList.Length; i++)
        {
            //Show if this player is a Master Client. There can only be one Master Client per Room so use this to define the authoritative logic etc.)
            string isMasterClient = (PhotonNetwork.playerList[i].IsMasterClient ? ": MasterClient" : "");
            GUI.Label(new Rect(5, 35 + 30 * i, 200, 25), PhotonNetwork.playerList[i].NickName + isMasterClient);
        }
    }

    void OnLeftRoom()
    {
        //We have left the Room, return to the MainMenu
        UnityEngine.SceneManagement.SceneManager.LoadScene("MainMenu");
    }
}- Lastly, create a new GameObject in the GameLevel scene and call it "_RoomController"
- Attach the RoomController script to the _RoomController Object
- Assign the PlayerInstance prefab and a SpawnPoint Transform to it then save the Scene
- Add both MainMenu and GameLevel to the Build Settings.

4. Making a test Build
Now it's time to make a build and test it:
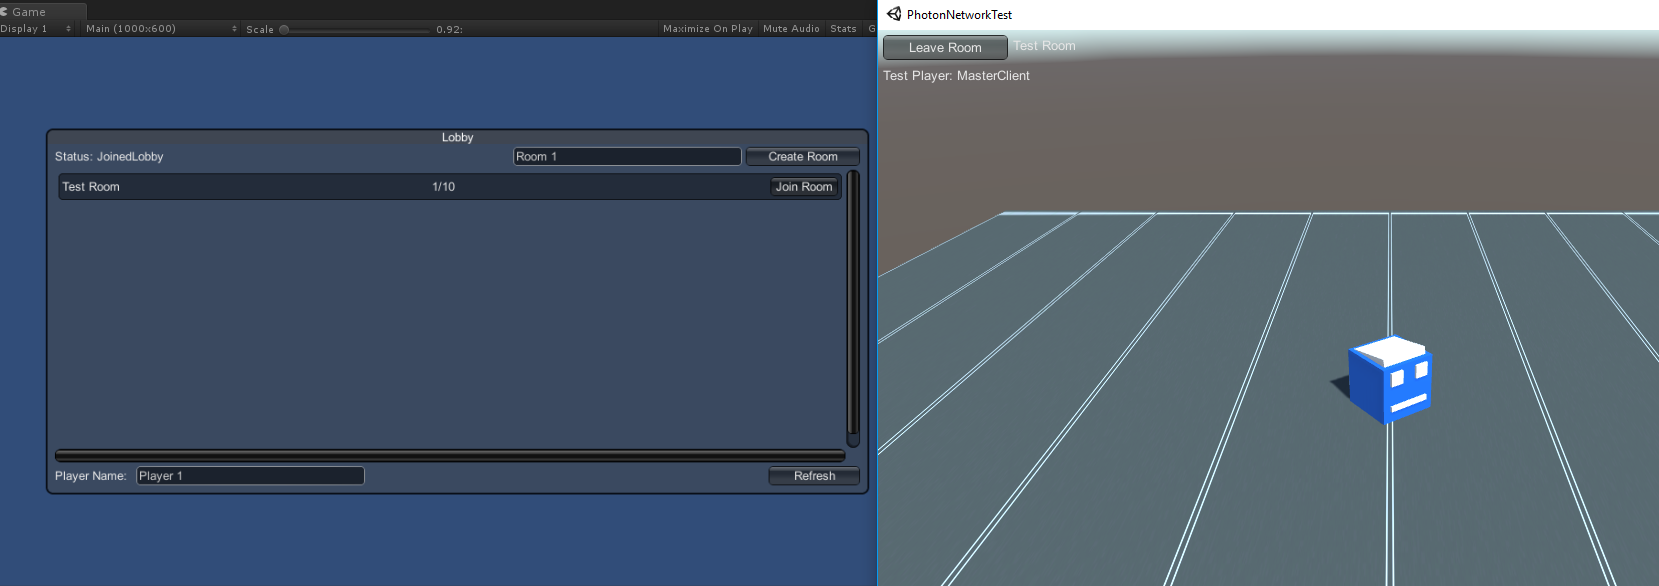

Everything works as expected!
Bonus
RPC
In Photon Network, RPC stands for Remote Procedure Call, it is used to call a function on Remote clients that are in the same room (You can read more about it here).
RPCs have many uses, for example, let's say you need to send a chat message to all the players in the Room. With RPCs, it's easy to do.
[PunRPC]
void ChatMessage(string senderName, string messageText)
{
    Debug.Log(string.Format("{0}: {1}", senderName, messageText));
}
Notice the [PunRPC] before the function. This attribute is necessary if you plan to call the function via RPCs.
To call the functions marked as RPC, you need a PhotonView. Example call:
PhotonView photonView = PhotonView.Get(this);
photonView.RPC("ChatMessage", PhotonTargets.All, PhotonNetwork.playerName, "Some message");
Pro tip: If your script is a Photon.MonoBehaviour or Photon.PunBehaviour you can use: this.photonView.RPC().
Custom Properties
In Photon Network, Custom Properties is a Hashtable that can be assigned to the Player or the Room.
This is useful when you need to set persistent data that doesn't need to be changed frequently (ex. Player Team name, Room Game Mode, etc.).
First, you have to define a Hashtable, which is done by adding the line below at the beginning of the script:
//Replace default Hashtables with Photon hashtables
using Hashtable = ExitGames.Client.Photon.Hashtable;
The example below sets the Room properties called "GameMode" and "AnotherProperty":
        //Set Room properties (Only Master Client is allowed to set Room properties)
        if (PhotonNetwork.isMasterClient)
        {
            Hashtable setRoomProperties = new Hashtable();
            setRoomProperties.Add("GameMode", "FFA");
            setRoomProperties.Add("AnotherProperty", "Test");
            PhotonNetwork.room.SetCustomProperties(setRoomProperties);
        }

        //Will print "FFA"
        print((string)PhotonNetwork.room.CustomProperties["GameMode"]);
        //Will print "Test"
        print((string)PhotonNetwork.room.CustomProperties["AnotherProperty"]);
Player properties are set similarly:
        //Set our Player's property
        Hashtable setPlayerProperties = new Hashtable();
        setPlayerProperties.Add("PlayerHP", (float)100);
        PhotonNetwork.player.SetCustomProperties(setPlayerProperties);

        //Will print "100"
        print((float)PhotonNetwork.player.CustomProperties["PlayerHP"]);
To Remove specific property just set its value to null.
        //Remove property called "PlayerHP" from Player properties
        Hashtable setPlayerProperties = new Hashtable();
        setPlayerProperties.Add("PlayerHP", null);
        PhotonNetwork.player.SetCustomProperties(setPlayerProperties);