Unity How to Create a Shader
Shader is a small script that contains mathematical calculations and algorithms for calculating the color of each pixel rendered, based on the lighting input and Material configuration.
Unity uses Shaders that are written in the following languages:
- A programming language called HLSL is used to write the shader programs themselves.
- A Unity-specific language called ShaderLab is used to define a Shader object, which acts as a container for the shader programs.
To create a shader in Unity follow the steps below:
Create a Shader
- Right-click on the Project view -> 'Create' -> 'Shader'

Depending on the Unity version you're using, the Shader options might differ, but here is what each of the options means:
- 'Standard Surface Shader': This shader is designed to work with Unity's Physically Based Rendering (PBR) system. It allows developers to create materials that respond to lighting conditions realistically. It supports various rendering features like normal mapping, specular highlights, and reflections. It's a versatile shader that provides a good balance between realism and performance.
- 'Unlit Shader': As the name suggests, an unlit shader does not consider lighting conditions. It's often used for rendering effects that don't need realistic lighting, such as UI elements, particle systems, or special effects. Unlit shaders are typically more efficient and can be useful in situations where it requires full control over the appearance of an object without any lighting calculations.
- 'Image Effect Shader': The image effect shaders are used to apply post-processing effects to the entire screen or specific render targets. They allow developers to modify the final rendered image after the main rendering is complete. Examples of image effects include blurring, color grading, distortion, or stylized filters. They can be used to enhance the visual quality or create specific artistic effects.
- 'Compute Shader': A compute shader is a type of shader that runs on the GPU but doesn't operate on pixels directly. It's used for general-purpose computations on parallel data, allowing developers to perform complex calculations or simulations efficiently. Compute shaders are commonly used for tasks like physics simulations, procedural generation, or data processing.
- 'Ray Tracing Shader': Ray tracing shaders utilize ray tracing technology, which simulates the behavior of light more accurately compared to traditional rasterization techniques. Ray tracing shaders are typically used for achieving highly realistic lighting, reflections, and shadows in real-time applications. They require powerful hardware and are often utilized in graphics-intensive fields like gaming or architectural visualization.
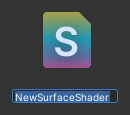
- After selecting the shader, type any name and press Enter

The new Shader is created and can be opened in any script editor and modified to fit your needs.
Default 'Standard Surface Shader':
Shader "Custom/NewSurfaceShader"
{
    Properties
    {
        _Color ("Color", Color) = (1,1,1,1)
        _MainTex ("Albedo (RGB)", 2D) = "white" {}
        _Glossiness ("Smoothness", Range(0,1)) = 0.5
        _Metallic ("Metallic", Range(0,1)) = 0.0
    }
    SubShader
    {
        Tags { "RenderType"="Opaque" }
        LOD 200

        CGPROGRAM
        // Physically based Standard lighting model, and enable shadows on all light types
        #pragma surface surf Standard fullforwardshadows

        // Use shader model 3.0 target, to get nicer looking lighting
        #pragma target 3.0

        sampler2D _MainTex;

        struct Input
        {
            float2 uv_MainTex;
        };

        half _Glossiness;
        half _Metallic;
        fixed4 _Color;

        // Add instancing support for this shader. You need to check 'Enable Instancing' on materials that use the shader.
        // See https://docs.unity3d.com/Manual/GPUInstancing.html for more information about instancing.
        // #pragma instancing_options assumeuniformscaling
        UNITY_INSTANCING_BUFFER_START(Props)
            // put more per-instance properties here
        UNITY_INSTANCING_BUFFER_END(Props)

        void surf (Input IN, inout SurfaceOutputStandard o)
        {
            // Albedo comes from a texture tinted by color
            fixed4 c = tex2D (_MainTex, IN.uv_MainTex) * _Color;
            o.Albedo = c.rgb;
            // Metallic and smoothness come from slider variables
            o.Metallic = _Metallic;
            o.Smoothness = _Glossiness;
            o.Alpha = c.a;
        }
        ENDCG
    }
    FallBack "Diffuse"
}
Default 'Unlit Shader':
Shader "Unlit/NewUnlitShader"
{
    Properties
    {
        _MainTex ("Texture", 2D) = "white" {}
    }
    SubShader
    {
        Tags { "RenderType"="Opaque" }
        LOD 100

        Pass
        {
            CGPROGRAM
            #pragma vertex vert
            #pragma fragment frag
            // make fog work
            #pragma multi_compile_fog

            #include "UnityCG.cginc"

            struct appdata
            {
                float4 vertex : POSITION;
                float2 uv : TEXCOORD0;
            };

            struct v2f
            {
                float2 uv : TEXCOORD0;
                UNITY_FOG_COORDS(1)
                float4 vertex : SV_POSITION;
            };

            sampler2D _MainTex;
            float4 _MainTex_ST;

            v2f vert (appdata v)
            {
                v2f o;
                o.vertex = UnityObjectToClipPos(v.vertex);
                o.uv = TRANSFORM_TEX(v.uv, _MainTex);
                UNITY_TRANSFER_FOG(o,o.vertex);
                return o;
            }

            fixed4 frag (v2f i) : SV_Target
            {
                // sample the texture
                fixed4 col = tex2D(_MainTex, i.uv);
                // apply fog
                UNITY_APPLY_FOG(i.fogCoord, col);
                return col;
            }
            ENDCG
        }
    }
}
Default 'Image Effect Shader':
Shader "Hidden/NewImageEffectShader"
{
    Properties
    {
        _MainTex ("Texture", 2D) = "white" {}
    }
    SubShader
    {
        // No culling or depth
        Cull Off ZWrite Off ZTest Always

        Pass
        {
            CGPROGRAM
            #pragma vertex vert
            #pragma fragment frag

            #include "UnityCG.cginc"

            struct appdata
            {
                float4 vertex : POSITION;
                float2 uv : TEXCOORD0;
            };

            struct v2f
            {
                float2 uv : TEXCOORD0;
                float4 vertex : SV_POSITION;
            };

            v2f vert (appdata v)
            {
                v2f o;
                o.vertex = UnityObjectToClipPos(v.vertex);
                o.uv = v.uv;
                return o;
            }

            sampler2D _MainTex;

            fixed4 frag (v2f i) : SV_Target
            {
                fixed4 col = tex2D(_MainTex, i.uv);
                // just invert the colors
                col.rgb = 1 - col.rgb;
                return col;
            }
            ENDCG
        }
    }
}
Default 'Compute Shader':
// Each #kernel tells which function to compile; you can have many kernels
#pragma kernel CSMain

// Create a RenderTexture with enableRandomWrite flag and set it
// with cs.SetTexture
RWTexture2D<float4> Result;

[numthreads(8,8,1)]
void CSMain (uint3 id : SV_DispatchThreadID)
{
    // TODO: insert actual code here!

    Result[id.xy] = float4(id.x & id.y, (id.x & 15)/15.0, (id.y & 15)/15.0, 0.0);
}
Default 'Ray Tracing Shader':
RWTexture2D<float4> RenderTarget;

#pragma max_recursion_depth 1

[shader("raygeneration")]
void MyRaygenShader()
{
    uint2 dispatchIdx = DispatchRaysIndex().xy;

    RenderTarget[dispatchIdx] = float4(dispatchIdx.x & dispatchIdx.y, (dispatchIdx.x & 15)/15.0, (dispatchIdx.y & 15)/15.0, 0.0);
}
Conclusion
Each shader type has its own strengths and uses. It's important to choose the appropriate shader based on your specific requirements and the visual effects you aim to achieve in your project.